Showing posts with label gifts. Show all posts

Wednesday, 23 October 2013

A Doorway Puppet Theatre

I'm still quite a long way behind schedule in making handmade gifts for family and friends this year.

I haven't given up! Better late than never!

But to improve the motivation a little, I thought I'd take a moment to bask in the glory of an earlier gift, which I made for my five nephews and nieces in Brisbane for Christmas, 2012.

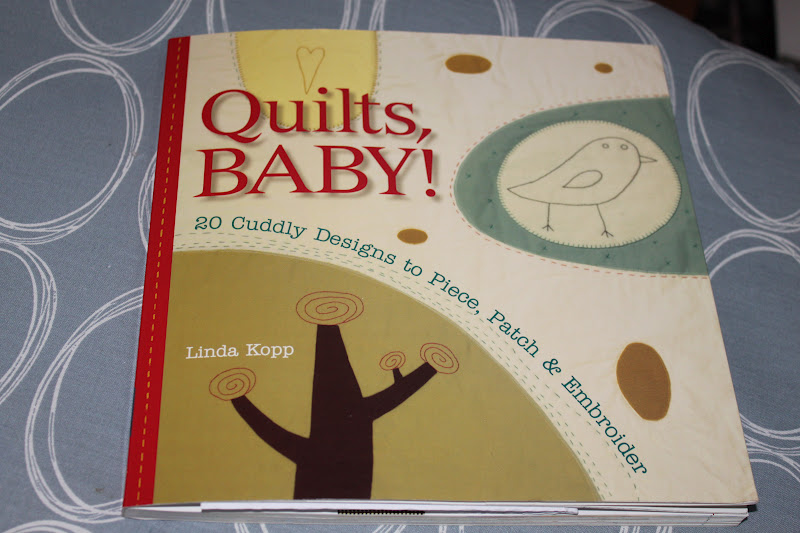
The project I chose was a doorway puppet theatre, featured in a great book called 'Cool Spaces for Kids' by Sam Scarborough (published by Hamlyn in 2009). This book is packed full of great ideas. I wish I had time to try them all!

My source of inspiration.

What the finished product should look like.

The book gives an outline of the process involved, and I didn't find it too difficult. The trickiest part was attaching the red bias binding (they used tape) around the stage, and managing the corners neatly.

Here is what my finished doorway puppet theatre looked like:

Time for a puppet show!

The doorway in my sister's home is wider than the one described in the book, so my puppet theatre was wider as a result. She didn't want to attach hooks to the wall, so my clever father made a timber frame with a rod to hang it from. So instead of tabs on the side at the top, I sewed a pocket to thread the rod through.

Laura, Joshua and Sarah put on a show.

The other issue with a wider opening was that it tended to gape at the bottom. Dad helped solve this problem too, by putting a very thin piece of timber underneath the bias binding before I sewed the back down. (I had taken the project up to Brisbane in January to finish using Mum's sewing machine).

Timmy took awhile to grasp the idea that you show the puppet and not yourself!

I gave Sarah, Josh, Ben, Laura and Timmy a puppet each, and the theatre as a group present. I'm not sure how much they have continued to use it, but they definitely enjoyed checking it out when they first received it.

Now to think of something for this Christmas ...

Sunday, 1 September 2013

A Felt Butterfly Mobile

About a fortnight ago I discovered that a friend from church has breast cancer. She underwent a mastectomy a couple of days ago.

When I first heard the news, I started to think of what I could make as a gesture of encouragement and support for her. She's an incredibly talented and creative person, which I found a little intimidating, but also made me think she would appreciate something a little outside the square.

Carolin loves butterflies, so I started with that. My plans changed several times, but gradually evolved into a felt butterfly mobile. Here is the finished product:


The completed felt butterfly mobile.

I based my mobile loosely on the one found on the Bugs and Fishes blog here. The first thing I had found in the supermarket was a notebook, so I chose felt colours based on that.

The notebook featuring a butterfly print.

I copied the butterfly template from the tutorial, and cut out 15 felt butterflies (three in each colour).  Then I threaded them in strings of two, three or four butterflies, with some little beads down the centre of each butterfly. I just used two strands of embroidery thread, as I couldn't find any fishing line at home. I was pretty pleased when I worked out a system for ensuring they were all the same distance apart, and stitched so they couldn't slide down.


The strings of butterflies ready to be hung.

Next I used a black pen to write the reference to a Bible promise on each butterfly. I tried to choose 15 texts that would be inspiring in the circumstances. In the notebook, I wrote out each text in full.


A butterfly with a text written on it.

I found the inside ring of an old embroidery hoop and tied the strings of butterflies at equal distances around it. Then I did my best to tie three strands of thread to a keyring above the hoop so the mobile could be hung easily. It was a little crooked, but not too bad!

Carolin posted a photo on Facebook after I gave the mobile to her, so here is a shot of it in it's new location in her home:

It is very satisfying to make something someone enjoys using!

As is often the case, now I've done this for someone else, I thought we could probably use one at home too. But it will have to wait awhile - my list of gifts to make is pretty long!

Monday, 29 July 2013

Felt Bird Keyring

It was my friend Nevila's birthday yesterday.

I had been looking forward to attending the Craft & Quilt Fair, but ended up staying home due to a lack of finances. So I thought - instead of looking at crafts, why not make something?

This felt bird keyring was a kit from a Mollie Makes magazine I purchased recently (a fantastic magazine, if you're not familiar with it). All I needed was some Bondaweb and stuffing. The instructions were simple, and I was really pleased with how it turned out.


I customised the keyring by sewing a felt patch on the back. On the patch, I embroidered "Math. 6:26", a reference to the words of Jesus:

"Look at the birds of the air; they do not sow or reap or store away in barns, and yet your heavenly Father feeds them. Are you not much more valuable than they?"


I got myself a little bit confused by embroidering straight onto the patch without writing the text out first. So it looks a little primitive, and "Matt." turned into "Math." by mistake. Still, it's the thought that counts, right?

I wrapped some fresh pumpkin scones (still warm from the oven) in a blue tea towel with white polka dots, added the keyring and a card, and Grace and I dropped off the package in the afternoon.

Another handmade gift done. I'm not sure how great it is for the recipient, but I find the process very satisfying and rewarding.

(A quick word of apology to those friends and family who are yet to receive a gift from me this year. My efforts are a little patchy. But I haven't forgotten you!)

Saturday, 16 February 2013

A Pair of Personalised Baby Bibs

A friend of mine gave birth to twin boys on Wednesday.

We're going to visit them in the hospital tomorrow.

They were born at around 37 weeks, and were good weights at birth. I'm sure they will thrive - although things might be a bit tough for their parents over the next few months! The couple already have two sons, aged five and three-and-a-half.

I purchased the twins a CD of worship songs and lullabies, and decided to make them each a personalised bib. While I didn't know their gender, I obviously knew they were expected, and had purchased the bibs already. I was just waiting for more details before getting out my cross stitch books.

A pair of matching personalised bibs for the twins.

It is cheating a little bit to purchase rather than sew the bibs, but given how far behind I am with my gifts for all the people with birthdays in February, I thought the compromise was justified!

I have quite a few books of cross stitch designs, alphabets and borders. I ended up drawing up my own design, based on a train in one book and an alphabet in another. I think it came together OK.

A train for Noah ...

... and a train for Aaron.

Having faced not being able to cross stitch again after thumb reconstructions a few years ago, it was lovely to find that I can still do it - and pain free, too! The only problem was, I'd forgotten how long it takes!

I hope my friend will appreciate a gift that is fairly basic and simple, but personal and made with love.

Wednesday, 13 February 2013

A Valentine's Day Gift

Tonight I made a simple little gift for Valentine's Day.

Another idea gleaned from Pinterest, I added an appliqued heart after I couldn't find any fabric with hearts on. I think I like this version better anyway!

A framed 'Love You' with appliqued heart.

Here's how to do it:

  1. Take the glass out of a photo frame (I had a spare one in the cupboard).
  2. Cut a piece of cardboard to fit inside the frame.
  3. Cut a piece of fabric about 2cm larger than the cardboard, then iron it.
  4. Iron some double-sided interfacing onto a small piece of red fabric.
  5. Draw a heart shape on the interfacing paper, then cut it out.
  6. Lay everything out to determine where to place the heart. 
  7. Remove the backing paper and iron the heart into position.
  8. Use a contrasting thread to stitch around the heart.
  9. Attach the backing fabric to the cardboard, using tape or a hot glue gun.
  10. Place the fabric-covered cardboard inside the frame, and secure the back.
  11. Use a hot glue gun to glue the letters in place.

A close up view.

What made this gift extra special to me was the fact that the Scrabble pieces are left over from our wedding.

When planning our reception, I had the idea of spelling each person's name in Scrabble letters instead of using place cards. Neil's mother and my family all enjoyed playing Scrabble, and I thought it might give people something to play with if they got bored during the speeches!

I bought a couple of bags of mixed Scrabble pieces from Ebay, and my very clever father made little stands to put them on. The hard part was working out exactly how many of each letter I needed! 

One of the place settings at the wedding (before the flowers were placed on the candelabras).

A message made for us by a table of wedding guests.

It's nice to have this connection between our wedding and my Valentine's Day gift for Neil. And it's nice to actually look back at the details of our day, which can easily be lost in the rush of everyday life.

In a brief speech at our wedding, I spoke of the fact that the name 'Neil' means "champion". Back then, I only knew a man who had captured my heart, and the dreams that we shared for the future.

Now I know a man who isn't perfect, but is still great to have around. I know a man who is a loving and involved father to my children, and who helps, supports and encourages me. I know the hardships we have been through together, the good times we have shared, and the dreams we still hold for the future.

Neil, you will always be my champion. And I'll love you forever.

Sunday, 3 February 2013

A Simple Tote Bag

Here is another handmade gift.

The completed tote bag.

This one I whipped up over a couple of hours last night, and gave to my friend Donna today for her birthday. It is a tote bag, which I thought might be useful as she commutes by train several days a week, and loves to read and do crosswords.

For this project I followed the instructions in Lotta Jansdotter's book, 'Simple Sewing'. I needed to concentrate to work out exactly what to do sometimes, but was surprised at how quickly it came together.

My inspiration this time.

My sewing machine is still having problems, but there were only a few loose stitches evident on the bag so I figured I could get away with it. The applique was inspired by one of the photographs in the book.

Details of the sewing.

Some decorative appliqued leaves.

I liked this bag so much, I think I might try to make myself one.

If I can find the time!

A Play Mat for Timmy

Here is the first of my handmade gifts for the year.

Timmy and his sisters checking out his new play mat and cars.

For my nephew Timmy's second birthday, I made a play mat from a fabric panel that featured a town, with roads, shops, a petrol station and car wash, school and police station.

I have to admit that I didn't follow a tutorial or a book or even something I'd seen on Pinterest this time. It all came from my imagination - and what I could find in the craft shop!

Essentially, I sandwiched some batting between the panel and a back I made by inserting a strip of fabric in some denim. Then I machine quilted by following the lines on the road, and sewing around the large road signs featured on the panel. (Thank you to my mum for the loan of her sewing machine).

Finished view - front.

Finished view - back.

I had to look up some instructions online about how to bind the quilt, and especially how to do the mitred corners. As my other quilt isn't finished yet, this was my first time doing anything like this. But I thought it came out alright.

The mitred corners weren't perfect, but not too bad for my first time!

I had purchased a few little cars to go with the mat, so decided to make a drawstring bag to house them all securely. I appliqued onto the bag a little piece of fabric with a car on it, as well as a little tag on which I quickly stitched a personal message.

The mat and cars on the drawstring bag.

All packed up in it's own bag.

You can tell I did this in a hurry!

The highlight for me was when my niece Sarah (almost nine) came and told me it was a really cool present!

Sarah, Timmy and Laura playing with the cars.


When you're two, you can drive two cars at once!

It certainly was rewarding to see them playing with something I had created. 

But I'd better keep at it. There are plenty more gifts to be made!

Tuesday, 1 January 2013

A Rag Doll - Part 1

I was going through my craft box the other night, and came across a calico doll I made. It must have been while I was in university - nearly 20 years ago!

This particular UFO (unfinished object) must be one of the oldest in my collection, and has travelled Australia with me. I thought it was high time I got it finished!

The calico doll's body.

The first thing I did was embroider the facial features (and I admit, I un-picked and re-did them a couple of times before I was happy).

The completed doll's face.

Next was the hair, which I had no idea how to do before coming across a tutorial on the Quaint and Quirky blog (found here). The instructions were really clear, and I didn't have too much trouble (except with the wool, which Grace had 'rearranged' for me earlier in the year).

Never leave a 2-year-old alone with two balls of wool!

My only tip would be to check the size of your doll's head. Because I already had a body, and didn't use the tutorial pattern, the hair was a little bit shorter than I would have liked.

This is what the doll looks like now:

Isn't she cute?

The hair is in a short bob, because it was only this long at the front.

I don't think I could be a hairdresser!

Next I'll make the clothes. Grace has reminded me a few times already.

"Mummy, the dolly is cold!"

Monday, 10 December 2012

A Crafty Kid's Suitcase

If you're wondering why I've been making a few more things recently, here's the reason ... my resolution for next year (early, I know!) is to make gifts for my family and friends instead of purchasing them.

My theory is that handmade gifts are unique, may be slightly more budget friendly, and will give me the satisfaction of developing new skills and putting thought and time into special creations for my loved ones.

So I've been reading blogs, studying my sewing and craft books, and getting lots of great ideas. And some of them I've put into practise a little early.

Like this crafty kid's suitcase I finished today for my niece Ayla's birthday in late December. I got the idea from the Mousehouse blog (found here) and followed the instructions given in the tutorial for attaching the items to the lid of the suitcase.

The back of the card where I attached the elastic before glueing it to the inner lid of the suitcase.

Ayla is turning three, so my suitcase contains more art and craft items, instead of the sewing and stitching items included in the lovely Mousehouse examples.

The suitcase, with most of the items inside.

Once again I've had a grand time over the last few weeks collecting suitable items. This suitcase contains:

  • kid's scissors
  • a glue stick
  • sticky tape
  • little stamps
  • an ink pad
  • a miniature paint set
  • ribbon
  • glitter glue
  • blank cards and envelopes
  • small blank notebooks
  • chenille sticks
  • pop sticks
  • embroidery threads
  • a pen
  • a sheet of white felt
  • a pencil case (with a set of crayons inside)
  • a rainbow pencil
  • colourful stickers

I was really pleased with how it looked when it was all put together. Just like the photos included with recipes, it's great when your final craft outcome looks like the picture given with the instructions!

The suitcase as it looks completed and full.

Grace would love one of these suitcases, so I think I'll be doing this again in about six months time!

Monday, 3 December 2012

Little Boxes of Sunshine

Don't you love Pinterest? I could spend hours browsing if I had the time.

And my time wouldn't be wasted, either. I've managed to glean quite a few good ideas. (That's my theory, and I'm sticking to it!).

Like the box of sunshine from the Happy Money Saver blog (found here). I've had a great time compiling items for two boxes I sent over the last few weeks.

The first went to a friend who was having some surgery in the midst of complex health issues. I used a printable from the blog to explain what it was all about before she got to the contents themselves.


Inside the box I included lemonade, camomile tea, assorted confectionery (including M&Ms of course, which aren't pictured), a stress ball, soap, crossword book, sticky notes and other things I thought might come in useful if you weren't feeling well.


The second box was sent to a friend who lives in England, in the hope that it might cheer her up amid the gloom of a northern winter.

The picture isn't great (obviously the flash didn't work), but this time the box contained everyday items like a mug, tea, soap, tea towels, lemonade, a sunshine cookie cutter, honey, fabric flowers, and various chocolates, biscuits and other edibles.


I cut out a few sunshine shapes from yellow cardboard, to help convey the theme.


Unfortunately the box was a bit too heavy, and is making its way to England by ship. But it has all worked out well. The day after I mailed it, I heard that my friend will be in Brisbane over Christmas anyway!

So if you're reading this, Tracey - surprise! Your package should arrive sometime in January/February, when I figure it should still achieve it's intended goal.

The only trouble now is, whenever I'm in the shops, my eyes are automatically drawn to anything yellow. Anyone else for a box of sunshine?

Monday, 10 September 2012

My First Quilt

For a few weeks now I've been working on a quilt to give my new little nephew when he arrives later this month.

I know that someone with three children under the age of four doesn't have a lot of time for things like quilting! But I found an excellent book full of small, simple quilts designed for babies. I chose a design based around applique, which is familiar to me, and decided to give it a go.

'Quilts Baby!', by Linda Kopp (2009), Lark Books.

Neil kindly helped to draw the pattern to scale, and Lucinda accompanied me to Spotlight to deliberate over fabrics. Then, in the evenings when the girls were all asleep, I got to work.

Piecing one of the back panels.

I haven't invested in all the necessary equipment, like cutting mats and a rotary cutter. My pieces were cut with scissors, and I decided to embrace the resultant imperfections as the sign of a truly unique, handmade item.

Basting the layers together ready for quilting.

I got the applique done, and even though the machine stitching didn't look exactly as I had anticipated, I forged ahead with basting the layers together ready for quilting.

And then, disaster struck.

Some of the faulty stitches.

After doing about a quarter of the quilting, I examined the underside of the quilt more closely and discovered there is a problem with the tension. The stitches look fine for awhile, then there is a loose loop of cotton before the normal stitches resume. It isn't an isolated incident, but has happened all the way along.

I took the machine in to the repair centre, where they confirmed there seems to be a problem with its internal timing and tension mechanisms. They can send it off to be serviced, at a cost of $119 plus parts. But given that it is 24 years old, it is probably approaching the end of its life span. However, a new machine costs about $500, and we haven't got that sort of money at the moment.

A walking foot might help with the tension, but it is hard to know if it will fix the problem.

So my first quilt is currently on hold. I'll start the task of delicately unpicking the faulty stitching while deciding what to do next.

But don't worry. I don't intend to let this remain a UFO (unfinished object) for long!

Sunday, 3 June 2012

Bags for the Big Sisters

I want to be able to give Grace and Charlotte each a little gift when their new baby sister is born, to mark the occasion for them.

When Charlotte was born, Grace received a Baby Bjorn doll with clothes, nappies and a bottle.

This time, I have collected two books each (about being a big sister, or having a little sister), a soft newborn baby doll with a wrap for Charlotte, and a little Sylvanian family baby with cot, high chair and pram for Grace.

I'm not sure where the idea came from, but I decided to make them each a bag to hold their gifts.

I bought plain calico bags from Spotlight, and appliqued their names on. This is how they turned out:


I'm pretty pleased with that. The girls might be a big young to appreciate it all, but at least I can feel like I've made something nice for them.